
User manual
Taking a test/survey
-
Introduction
The process of taking tests and surveys is identical. On this page, everything will be explained using tests as an example, but the same rules apply to surveys.
All tests assigned to a candidate, as well as those they can book themselves, are accessible on the candidate's Assignments page. For further information on available options within this page, refer to the Assignments help page.
-
Accessing a test
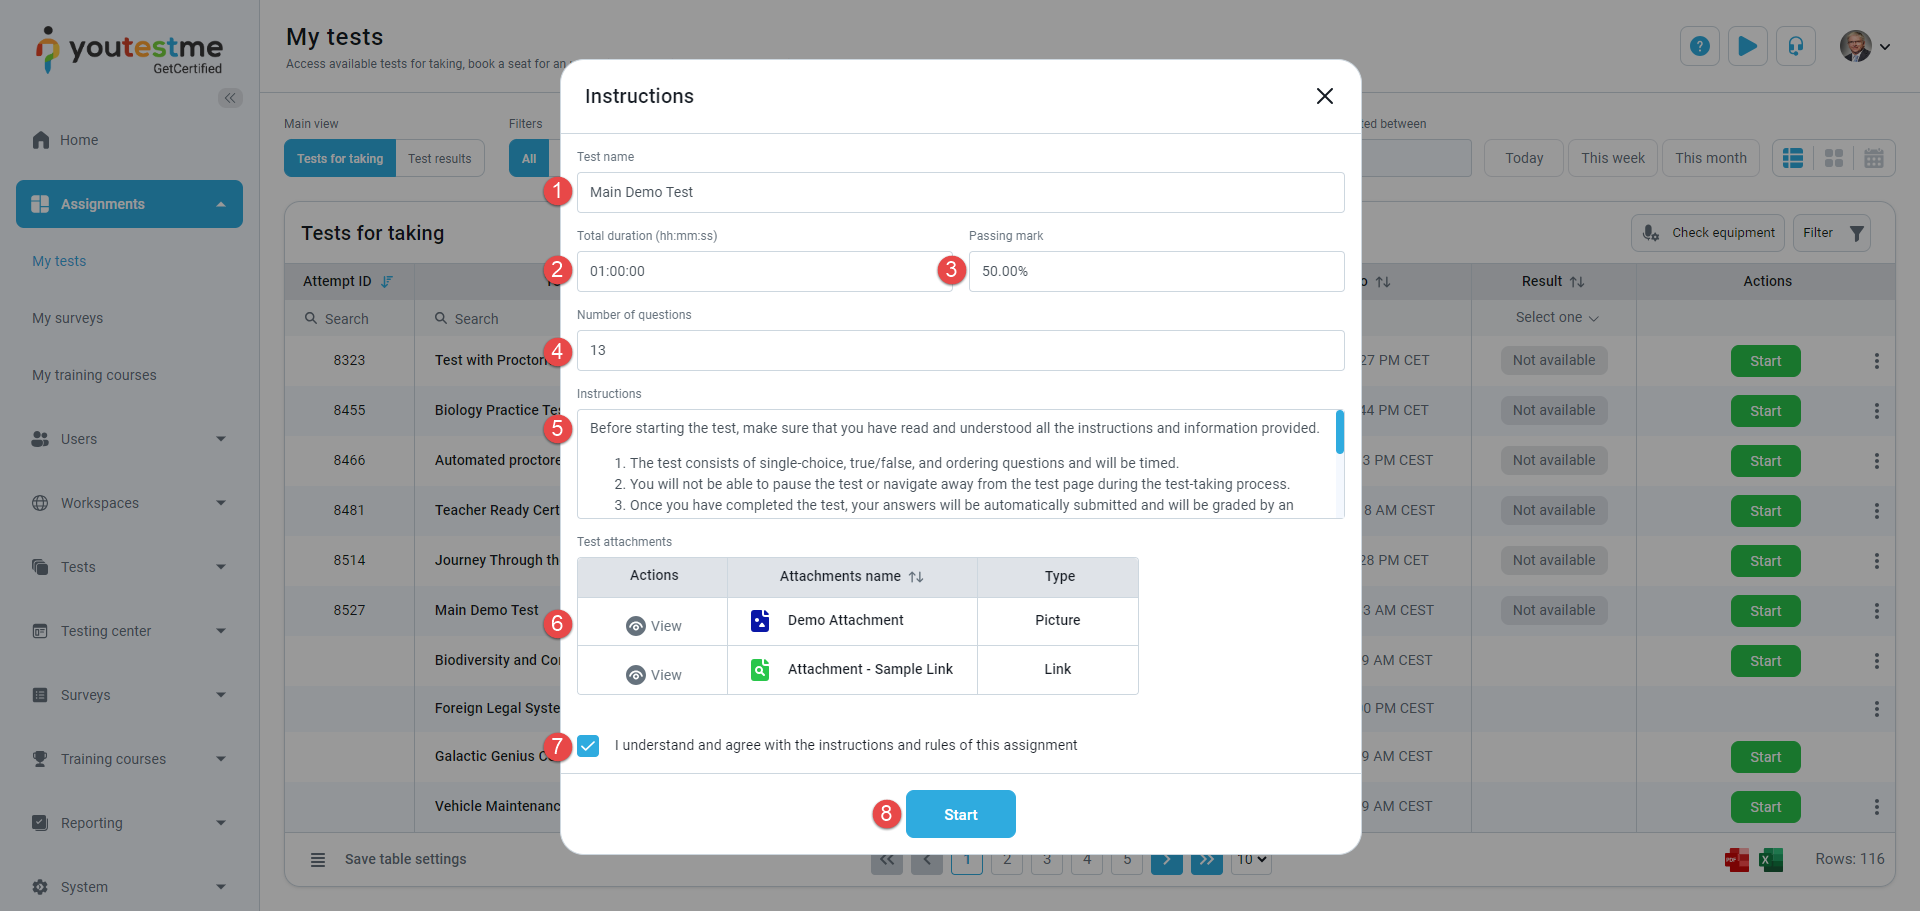
When you click the button to start the test, a pop-up dialog will appear displaying various information related to the test-taking process, including:
-
Test name.
-
Total duration available for completing the test.
-
Passing mark - The percentage that must be achieved to pass the test.
-
Number of questions the test contains.
-
Instructions - Important rules, instructions, or notes that must be acknowledged before starting the test. This may include details on breaks, calculator usage, permitted learning materials, etc.
-
Test attachments These may be accessible only on this page (before starting the test) or throughout the whole test-taking process. Click the View button to open the attachment.
-
You may also be required to acknowledge test instructions by selecting a checkbox.
-
Click the Start button to begin the test.
When initiating a test, additional fields and pop-ups may appear if the following options are enabled during the test creation:
-
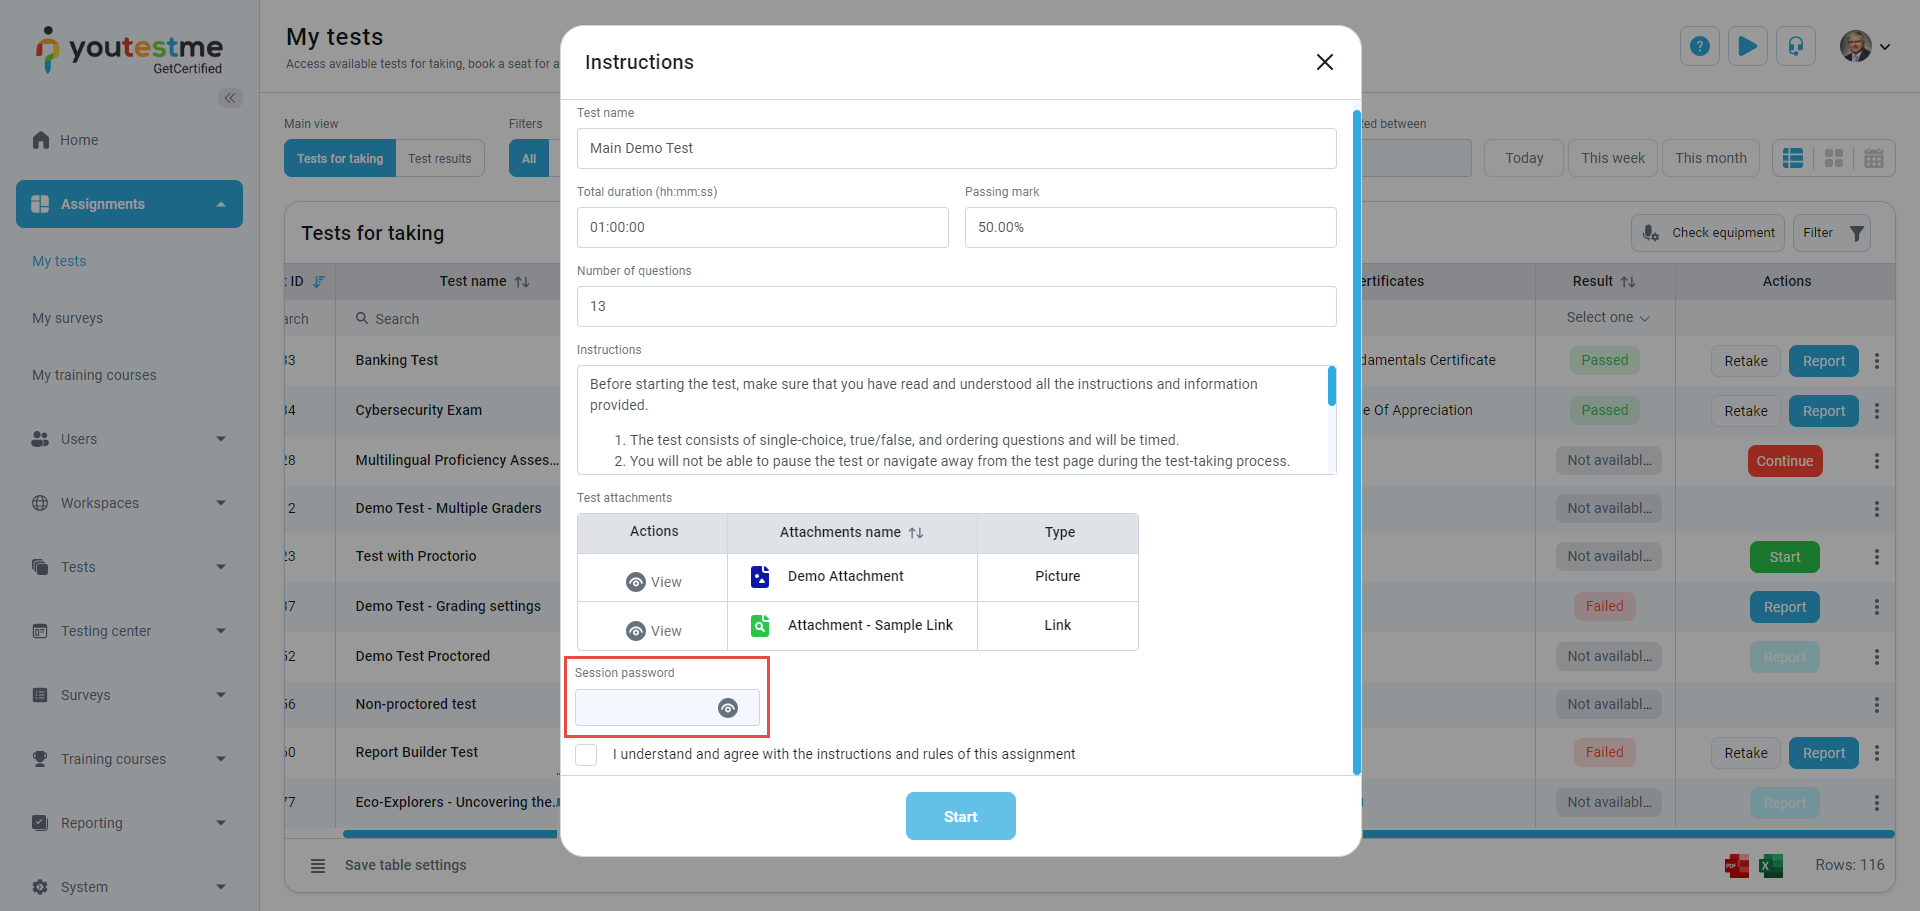
The testing session is locked - When a testing session is locked, you must enter a password to start the test. The field for entering the password is in the same introduction dialog described above. The test organizer should provide you with a password for unlocking the test. If you have not received the password, contact your test organizer.
-
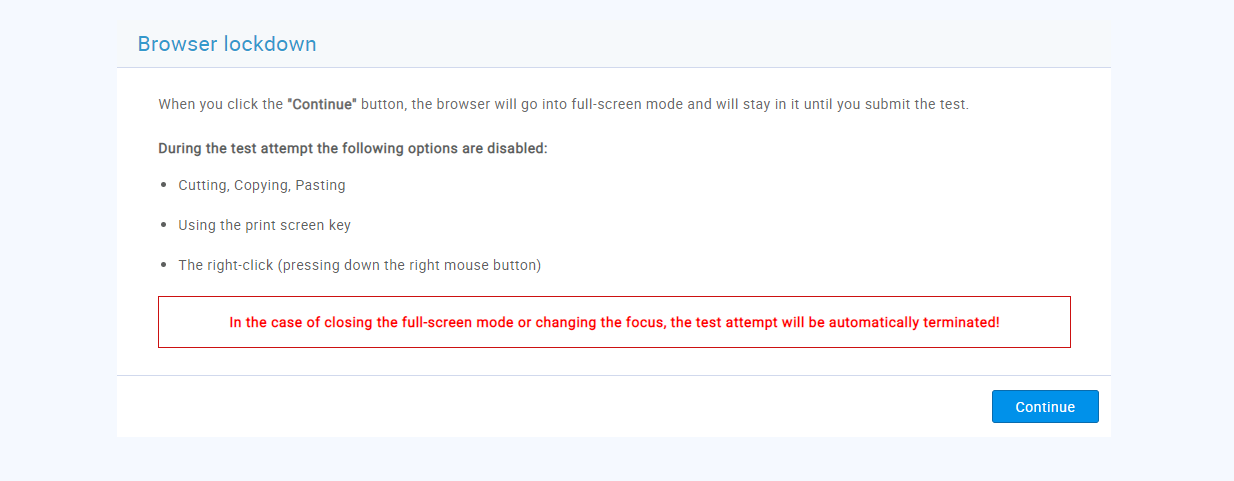
If the Enable browser lockdown option is enabled, a window will prompt you that certain functions are disabled during the test attempt. These include right-clicking, cutting, copying, and pasting using shortcuts. Additionally, the following actions are forbidden: using the print screen, Esc and Windows keys, closing full-screen mode, using function keys at the top of the keyboard, and changing focus to another screen. To begin the test, click the Continue button.
-
Proctoring mode is enabled - Once you accept the test instructions, a pop-up for equipment check will appear.
-
The system will check if the browser is in full-screen mode and whether the microphone, camera, and internet connection are functioning properly.
Note: You should allow the usage of the camera, microphone, and screen share if this pop-up appears.
-
In the following step, you may be required to take a picture of yourself. The system will use your picture to compare it to the person in front of the camera during the test and validate your test attempt.
-
Next, you may be asked to take a picture of your ID document to confirm your identity.
-
You may also be required to scan your environment with a camera. Scan the code displayed on the screen to access the link where you can record your surroundings.
Note: Depending on your test configuration, some of these options may not be required.
For more information on how to resolve issues that may arise during the equipment check process, refer to our Troubleshooting knowledge base section.

-
-
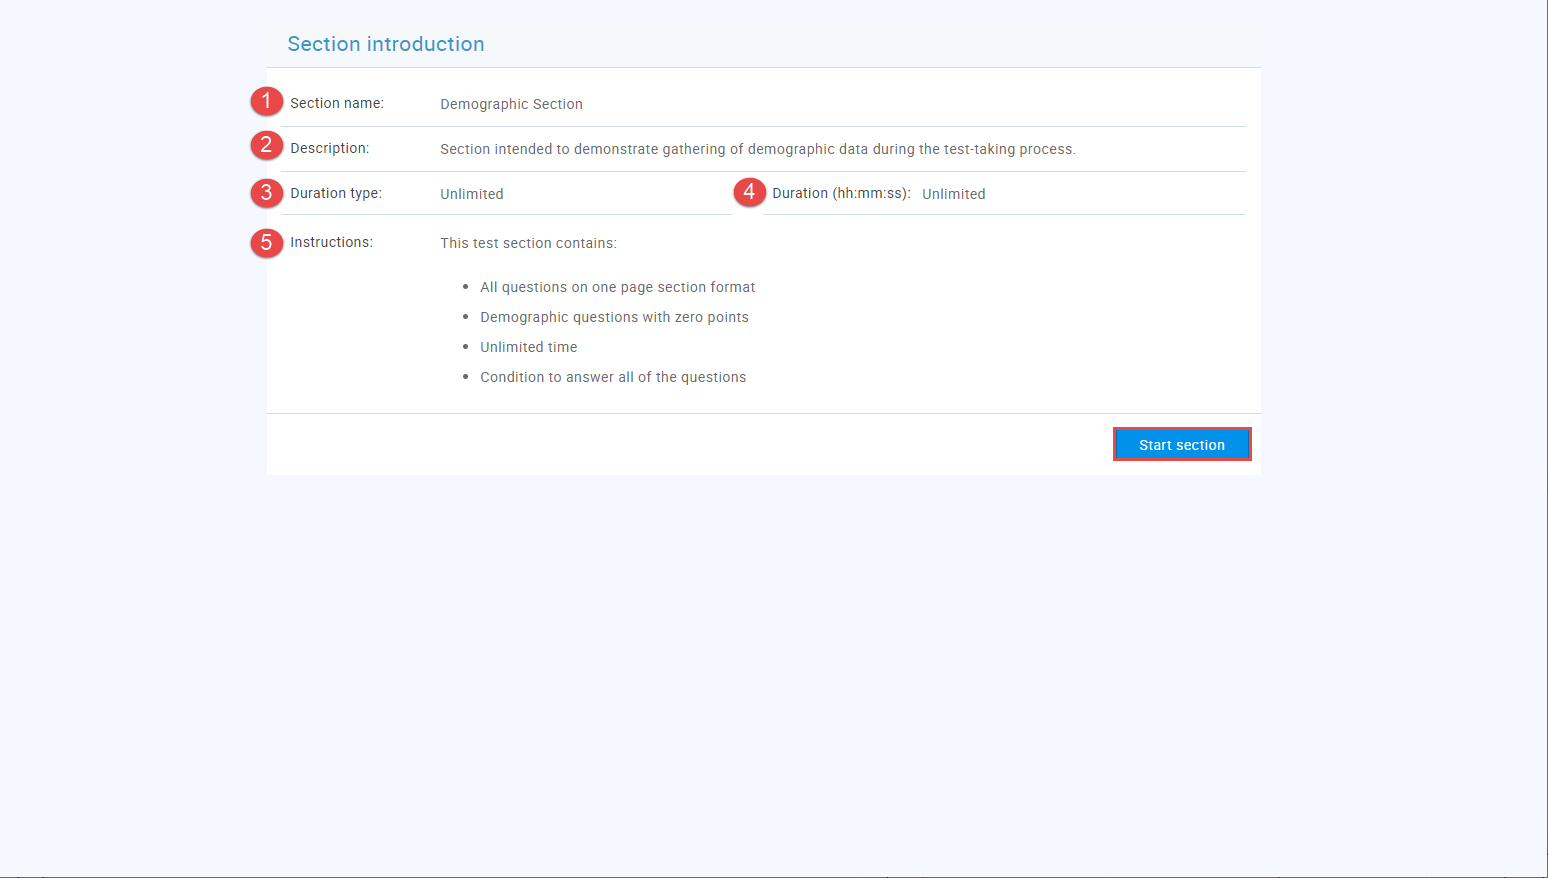
The test has one or more sections - If the test consists of one or more sections, a window will display the following information before starting each section:
-
Section table - Provides details about sections, including their availability period and status. If a section name is disabled, it indicates that the section is already completed, expired, or still unavailable.
-
Section name - Indicates the name of the test section you are about to start..
-
Total duration available for completing the section.
-
Instructions - Presents important rules, instructions, or notes that must be acknowledged before starting the section.
-
Additionally, the following actions may be available on the screen:
-
Start section - Select the desired section and click this button to begin. If the section has expired, this button will be disabled.
-
Continue to section - Click this button to resume a section you've already started and left. If the section has expired, this button will be disabled.
-
Next section - If you've started a section and left the test, and the section has expired, click this button to proceed to the next available section.
-
Exit the test and continue it later - Leave the test and return later to continue from where you left off, preserving your work and answers.
-
Finish test - Click this button to complete the test when no available sections remain accessible.
-
Refresh - Click this button to refresh the table.
-
-
-
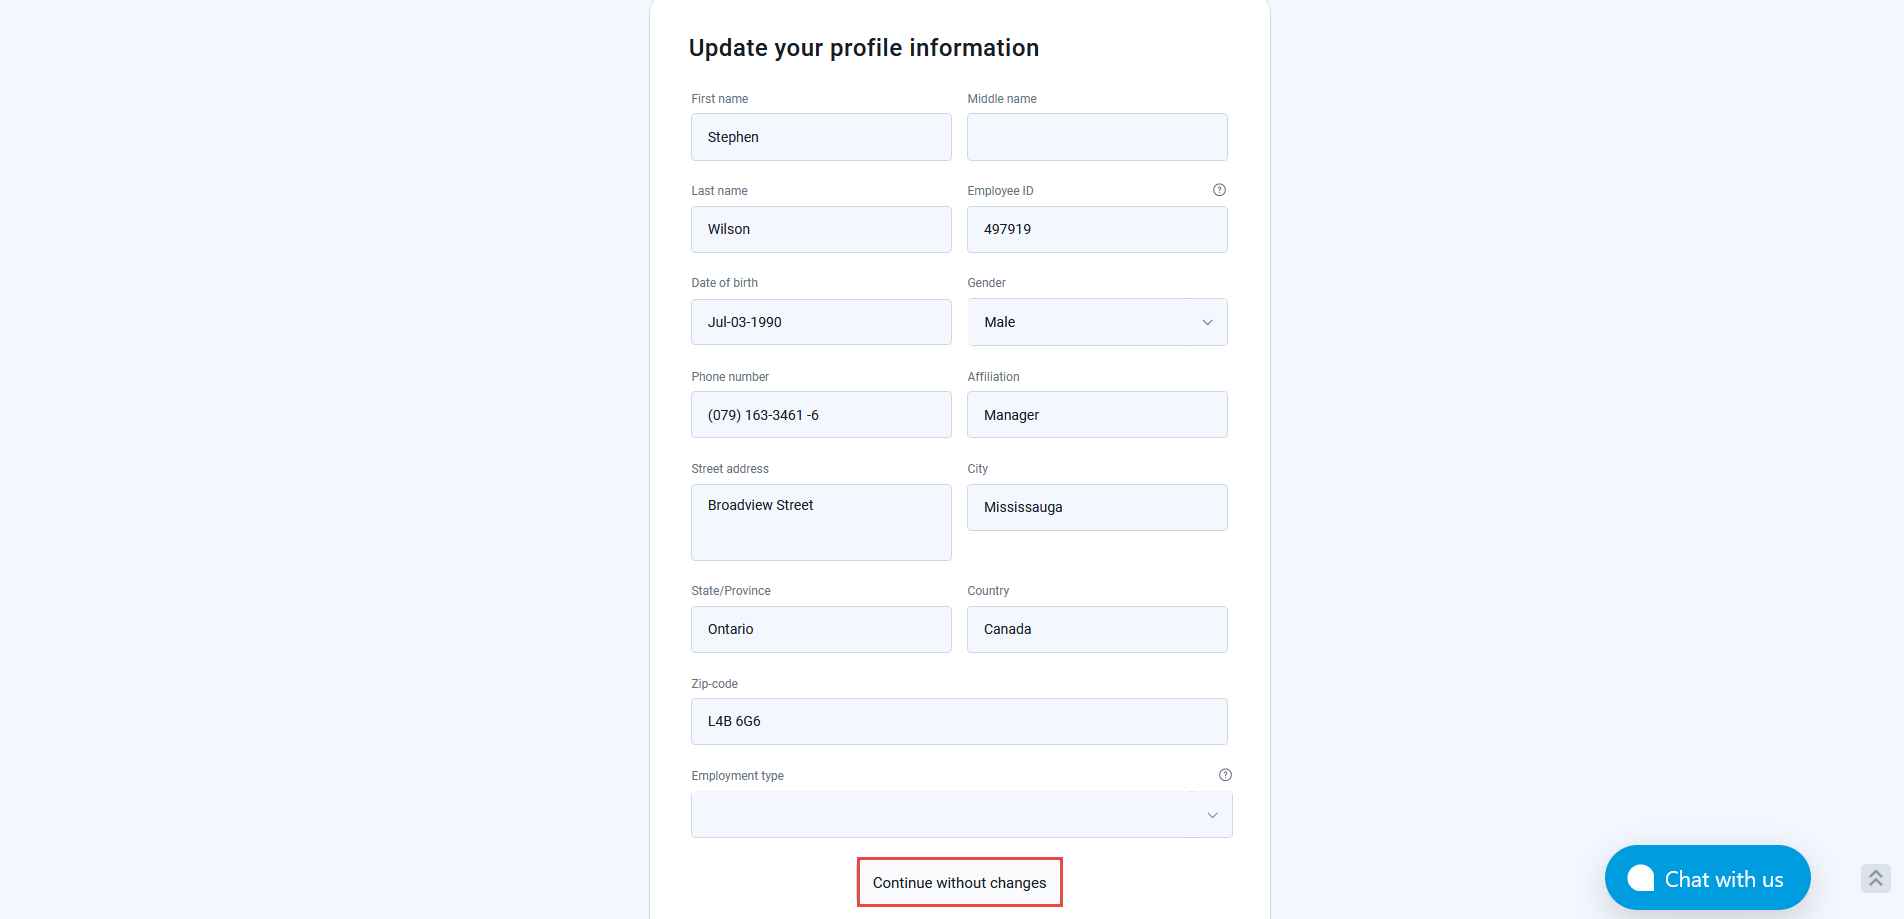
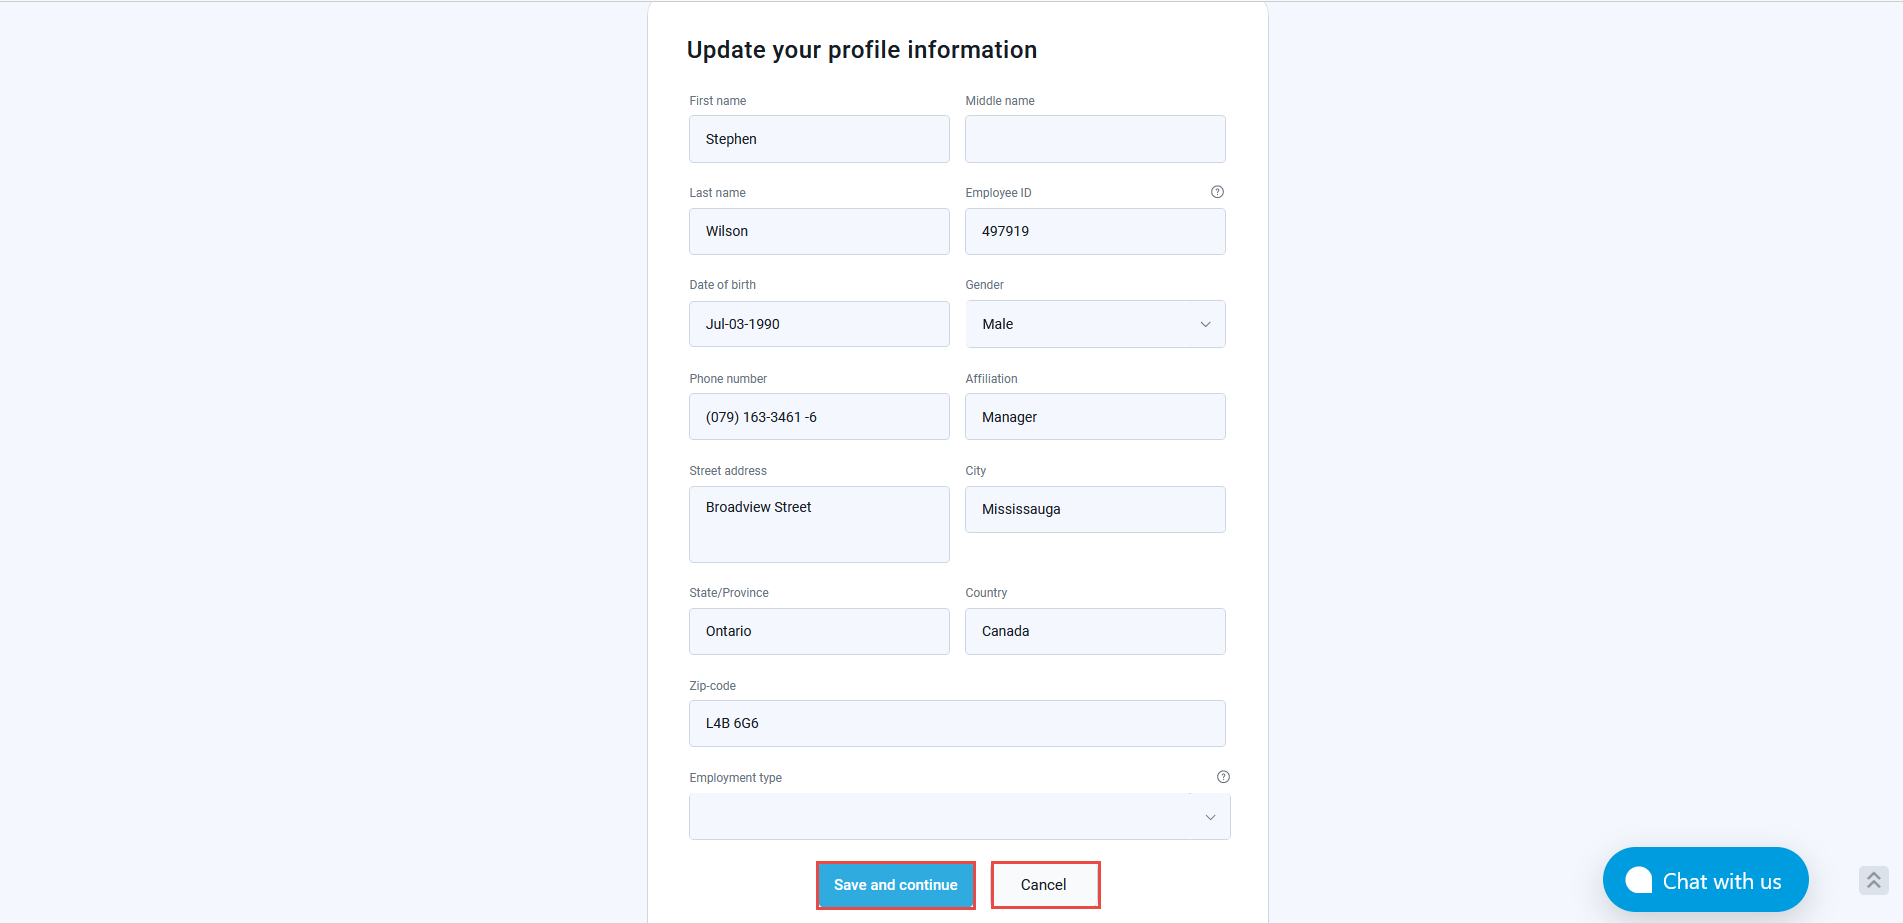
Require updating user profile is enabled - When you accept the test instructions, a pop-up for updating your personal information will appear. Here, you can:
-
Continue without changes - If you have not made any changes, click this button.
-
Save and continue - This button will appear after making changes. Click it to save the changes and start the test.
-
Cancel - This button will appear after making changes. Click it to discard the changes. To start the test, you should also click the Continue without changes button.
-
-
Accessing a practice test
If the Practice test option is enabled, you can use practice tests to prepare for the official test. On the Assignments page, filter the list of tests to display practice tests.

To generate a practice test, click the Start/Retake button.
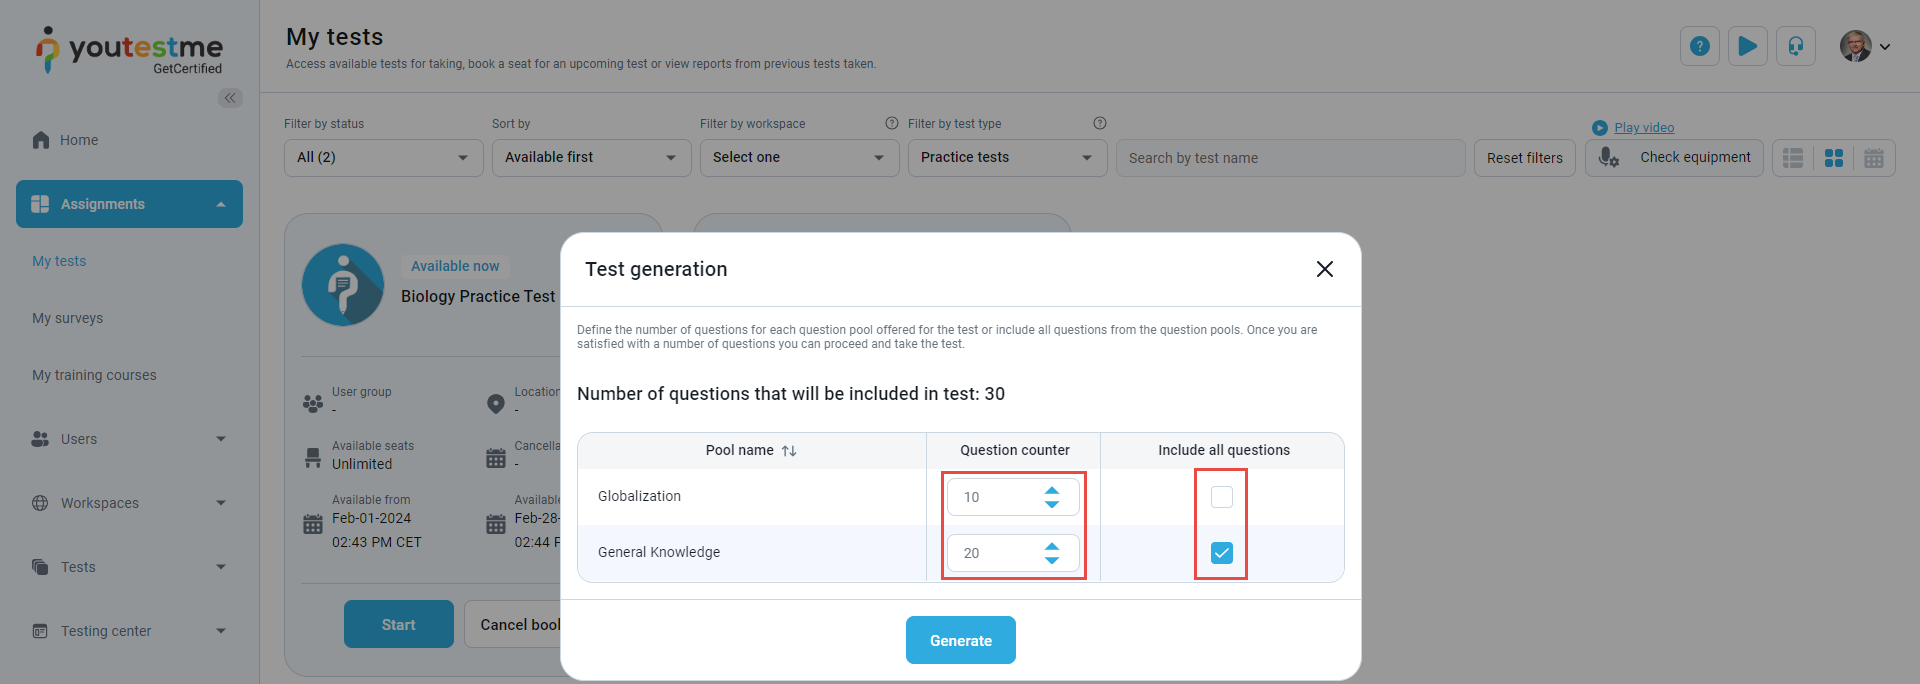
If the test has been generated based on question difficulties, a pop-up dialog will appear where you can set the number of questions for each difficulty level in each question pool included in the test:
-
Edit the number of questions for each difficulty level.
-
Include all questions from the question pool by checking the checkbox in the Include all questions column.
-
Click the Generate button to start the test. After selecting it, the Instructions dialog will appear.

If the test has been generated based on question categories, a pop-up dialog will appear where you can set the number of questions for each question pool included in the test.
-
-
-
Test-taking page
This section will explain the most important options and information for test-taking.
-
General options
-
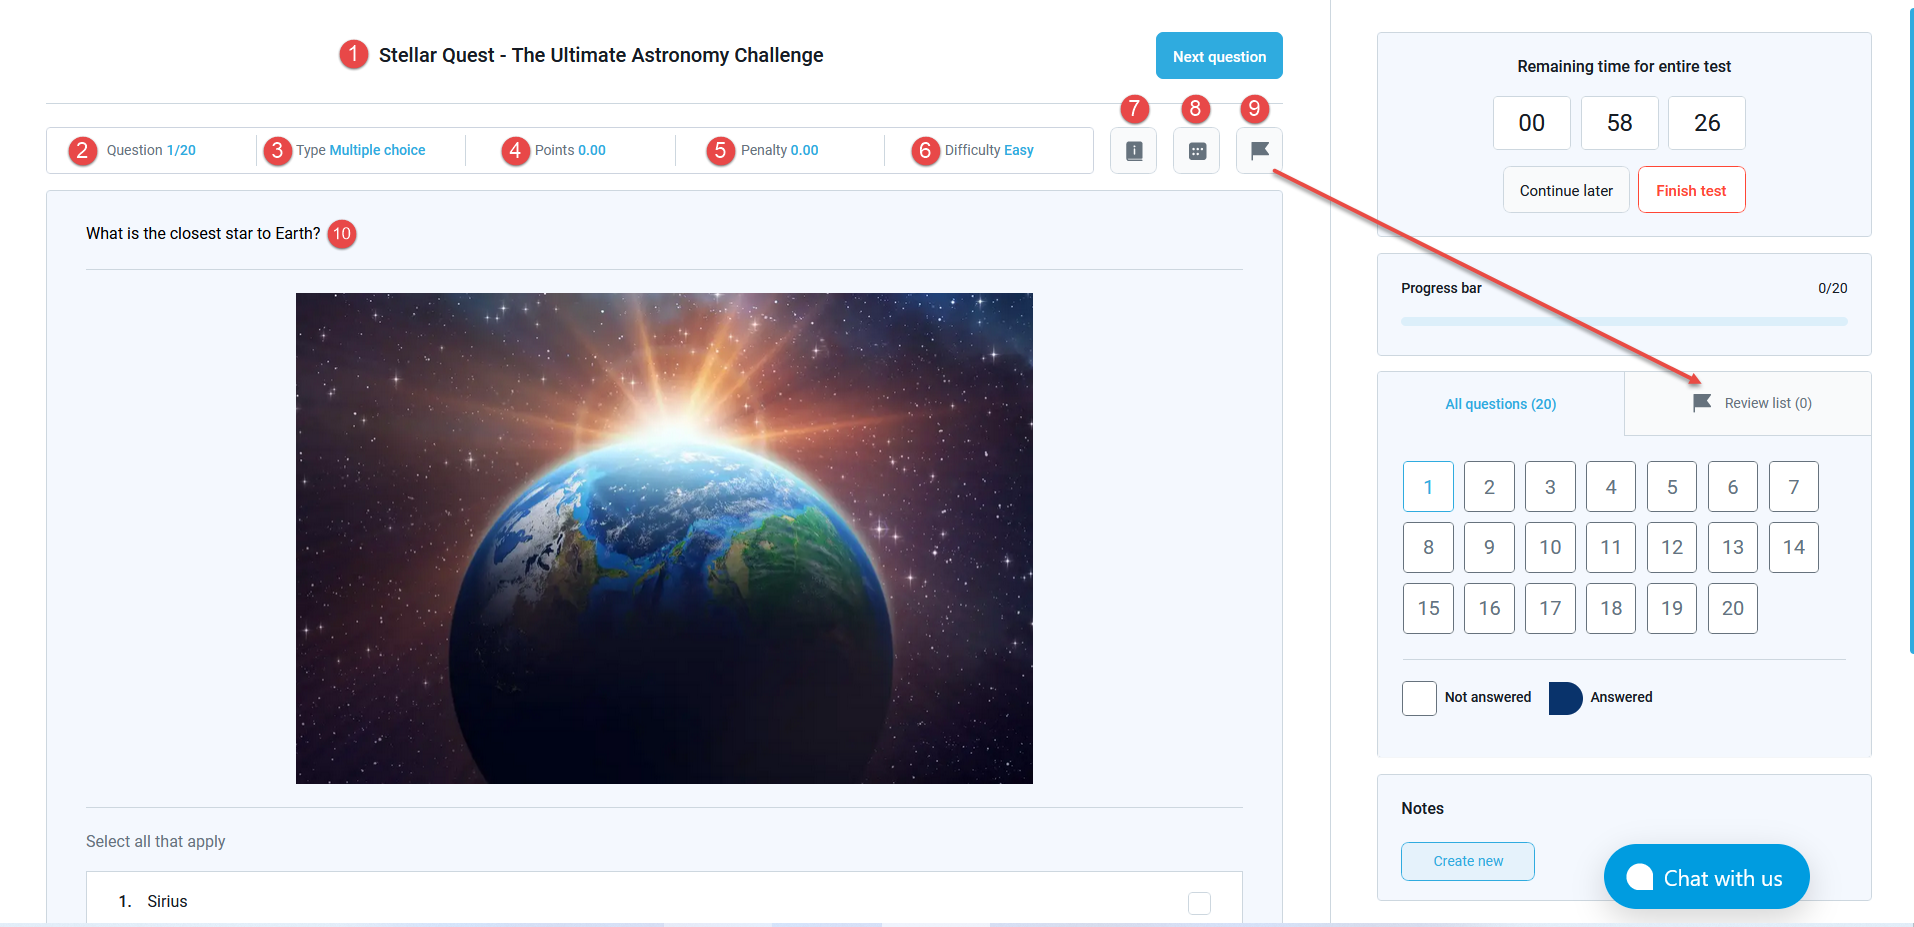
The name of the test. If the test contains sections, the section name is also displayed.
-
Ordinal number of the current question and total number of questions.
-
Number of points earned for a correct answer.
-
Number of negative points earned for an incorrect answer.
-
Difficulty level of the question, which can be easy, medium, or difficult.
-
Instructions button - Click this button to view the test or section instructions.
-
Calculator button - Indicates the availability of a calculator that can be used to answer questions.
-
Flag button - By clicking this button, you can flag the question for review. You can view your review list at any time on the right panel. Click the same button again to unflag the question.
-
The question text, which may include text and multimedia elements.
-
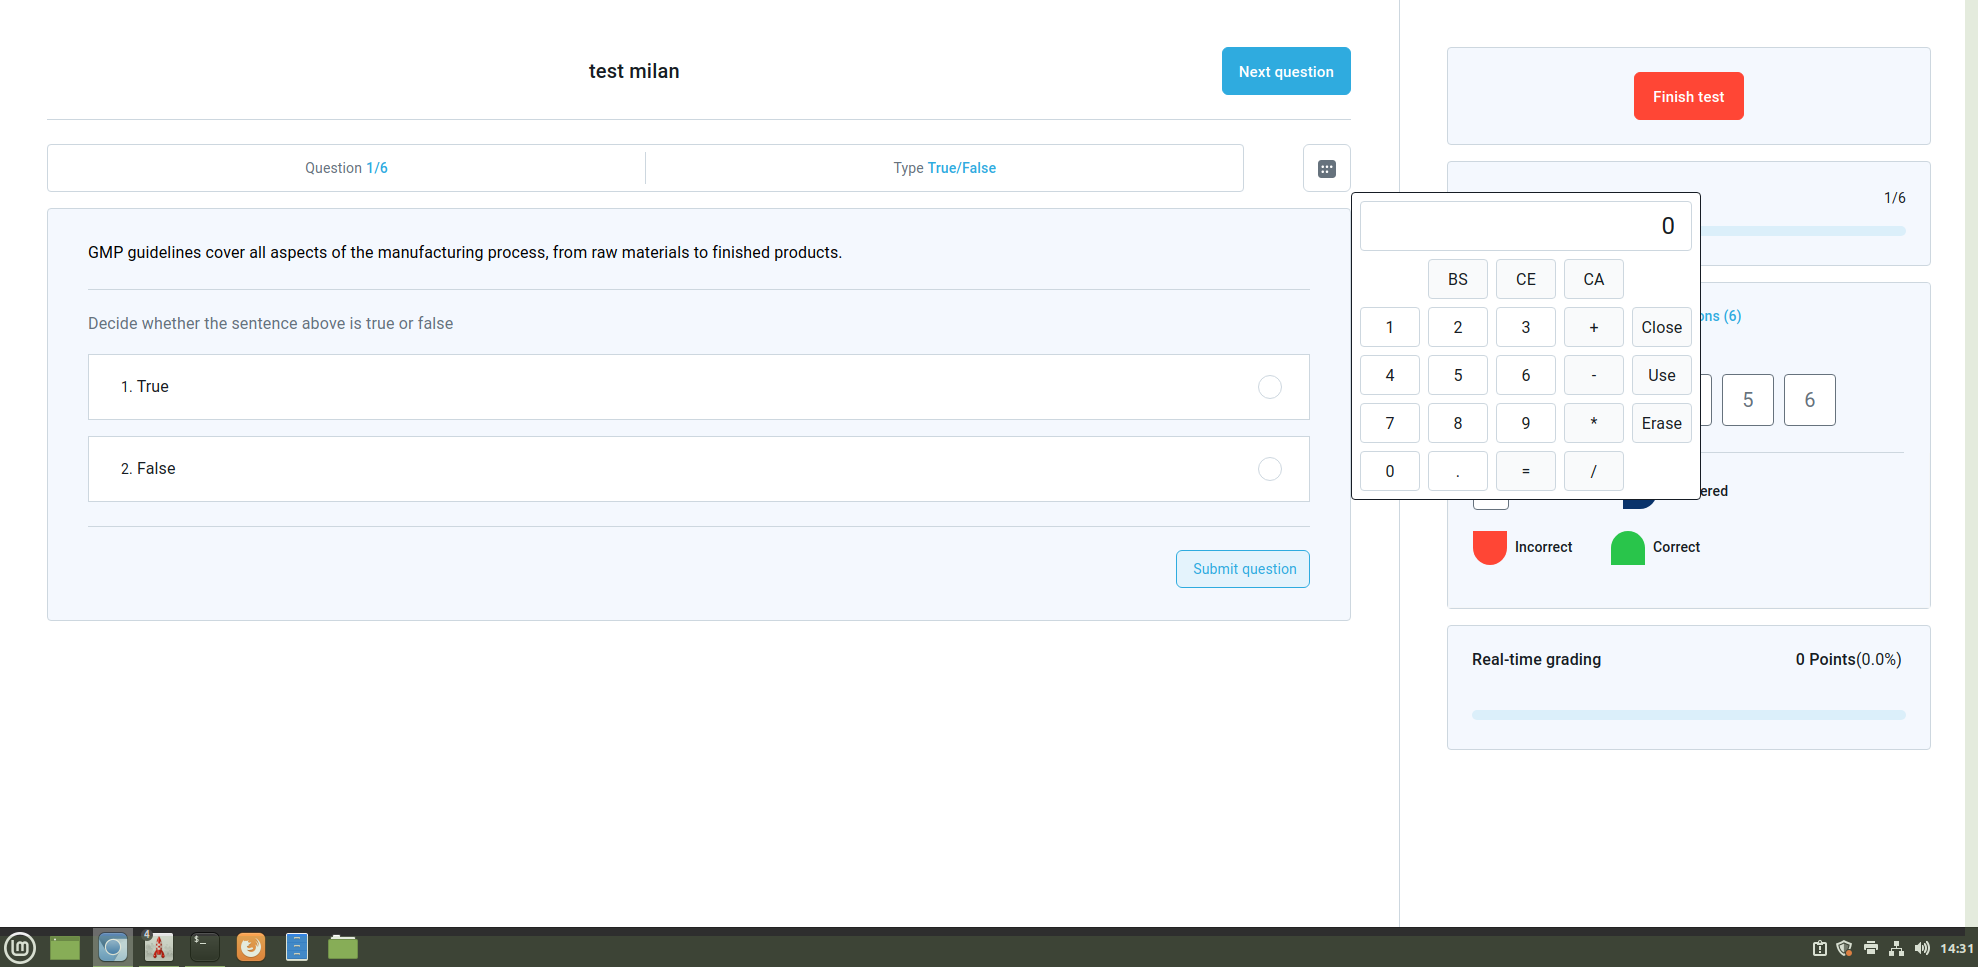
Simple calculator
-
BS - Delete the last entered digit of the number.
-
CE - Delete the last entered number in the calculation.
-
CA - Reset Calculator.
-
-
-
Main buttons
-
Previous question - Returns to the previous question. This button is displayed only if the option is enabled during test creation.
-
Next question - Moves on to the next question.
-
Upload file - Allows you to answer the question with a picture, table, diagram, etc.
-
I will not answer this question to avoid possible negative points button - Allows you to skip the question to avoid possible negative points for answering incorrectly.
-
Feedback for this question button - Provides an opportunity to define the question's difficulty and offer feedback visible to test managers.
-
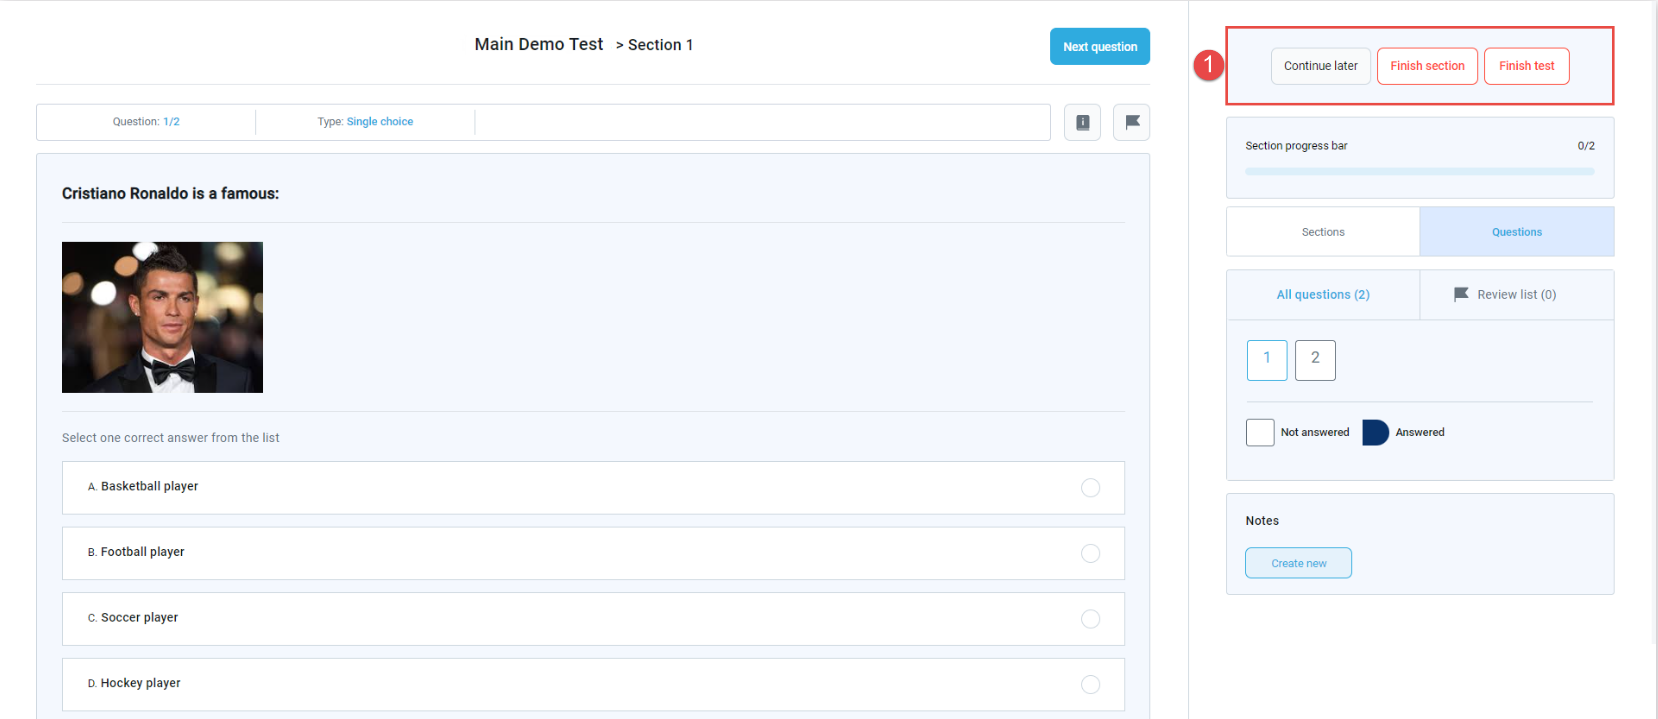
Continue later - Pauses the test. You can resume it later during the testing session availability period. All answered questions will be saved.
-
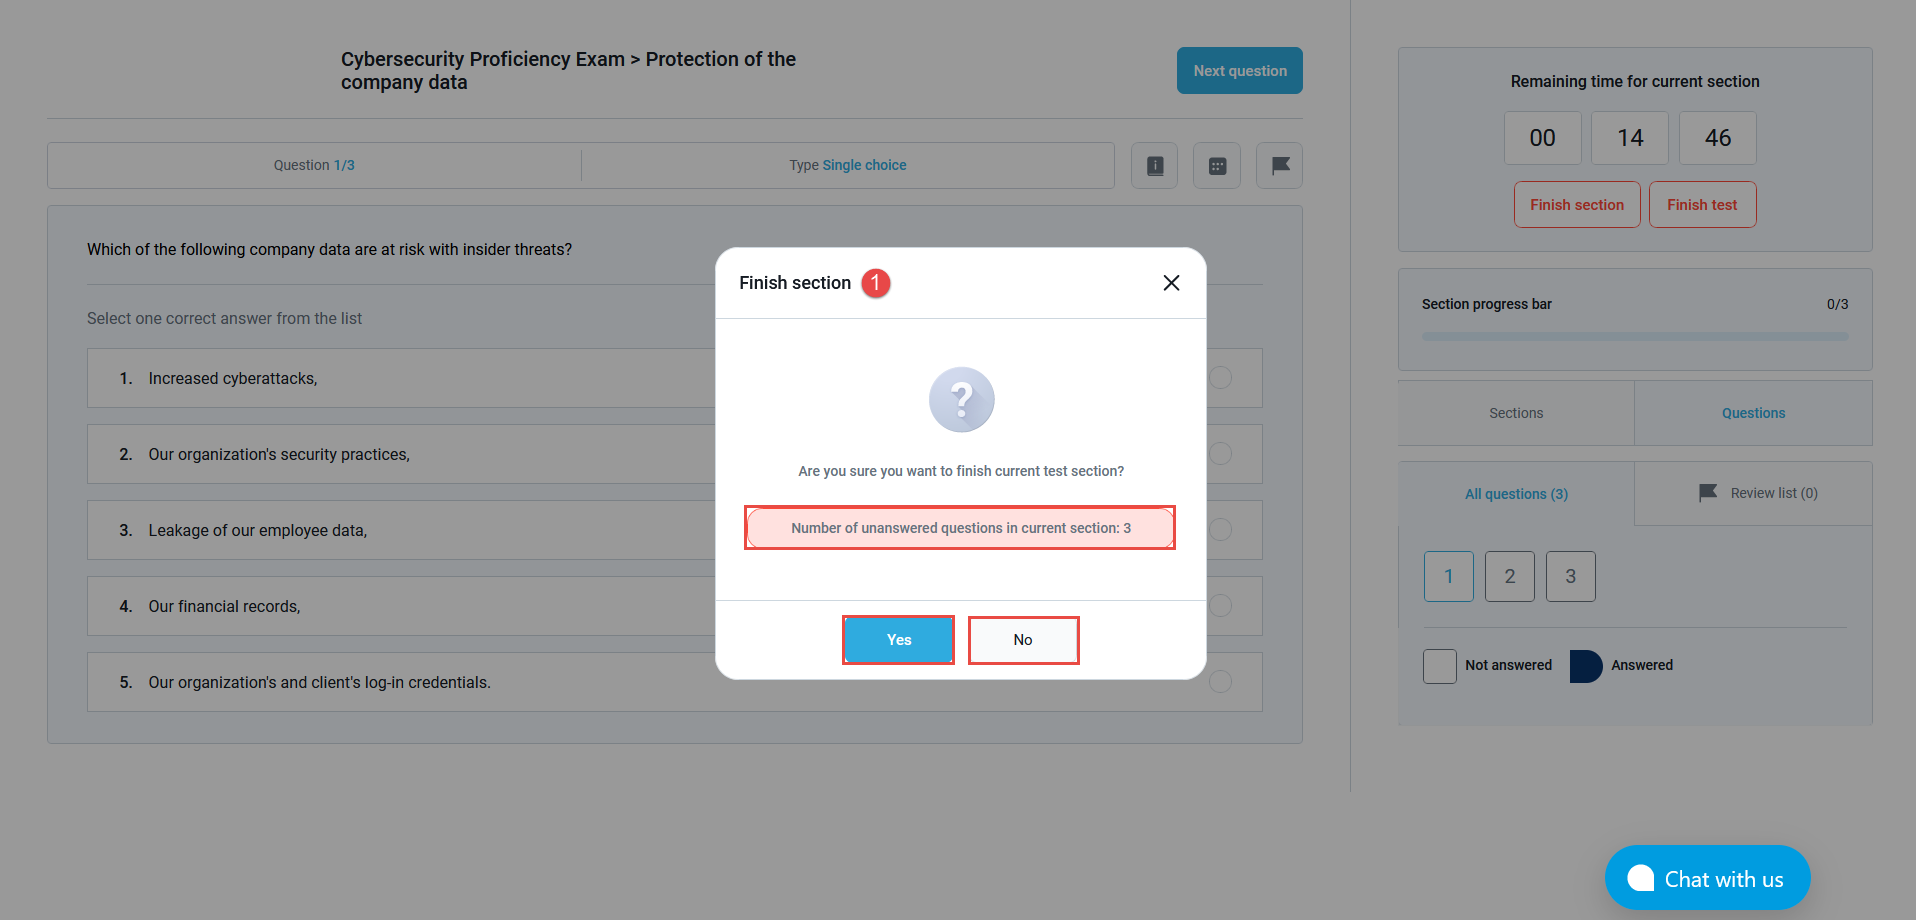
Finish section - This button is displayed only if the test has multiple sections. Once you finish the section, you will submit your answers and cannot change them anymore.
-
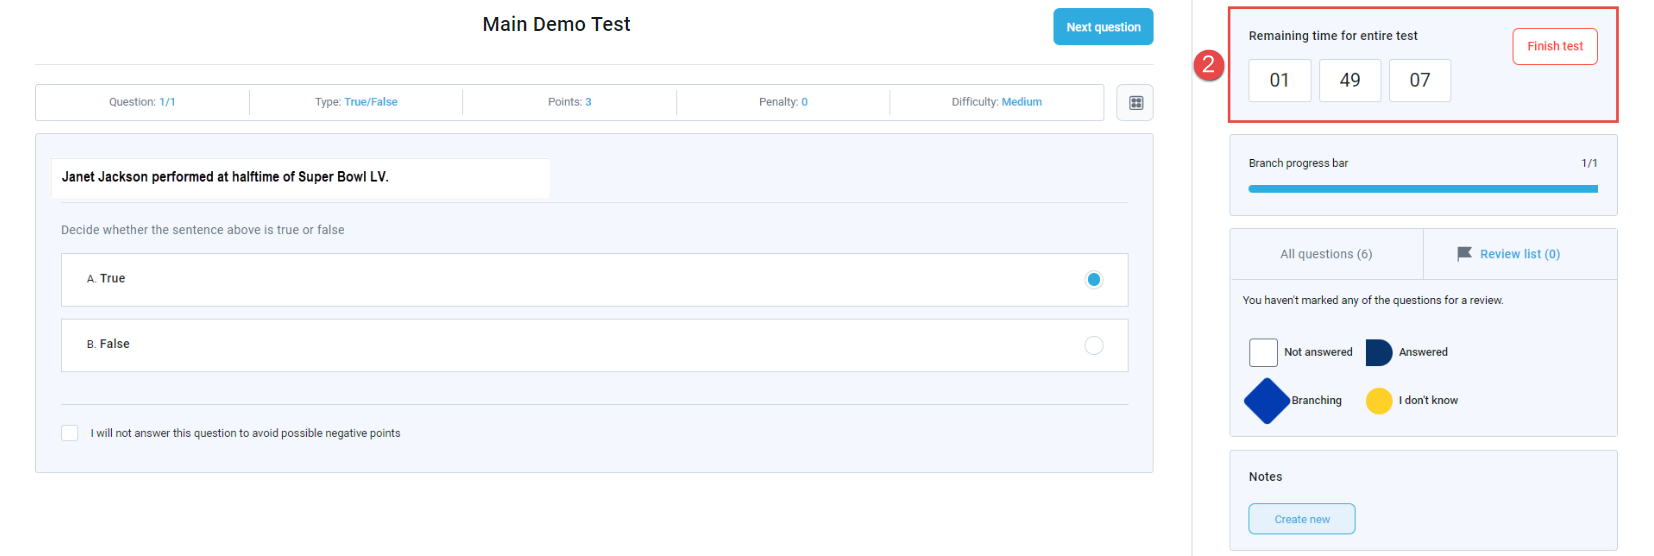
Finish test - Completes the test. Clicking this button submits your answers, and you cannot change them anymore.
-
-
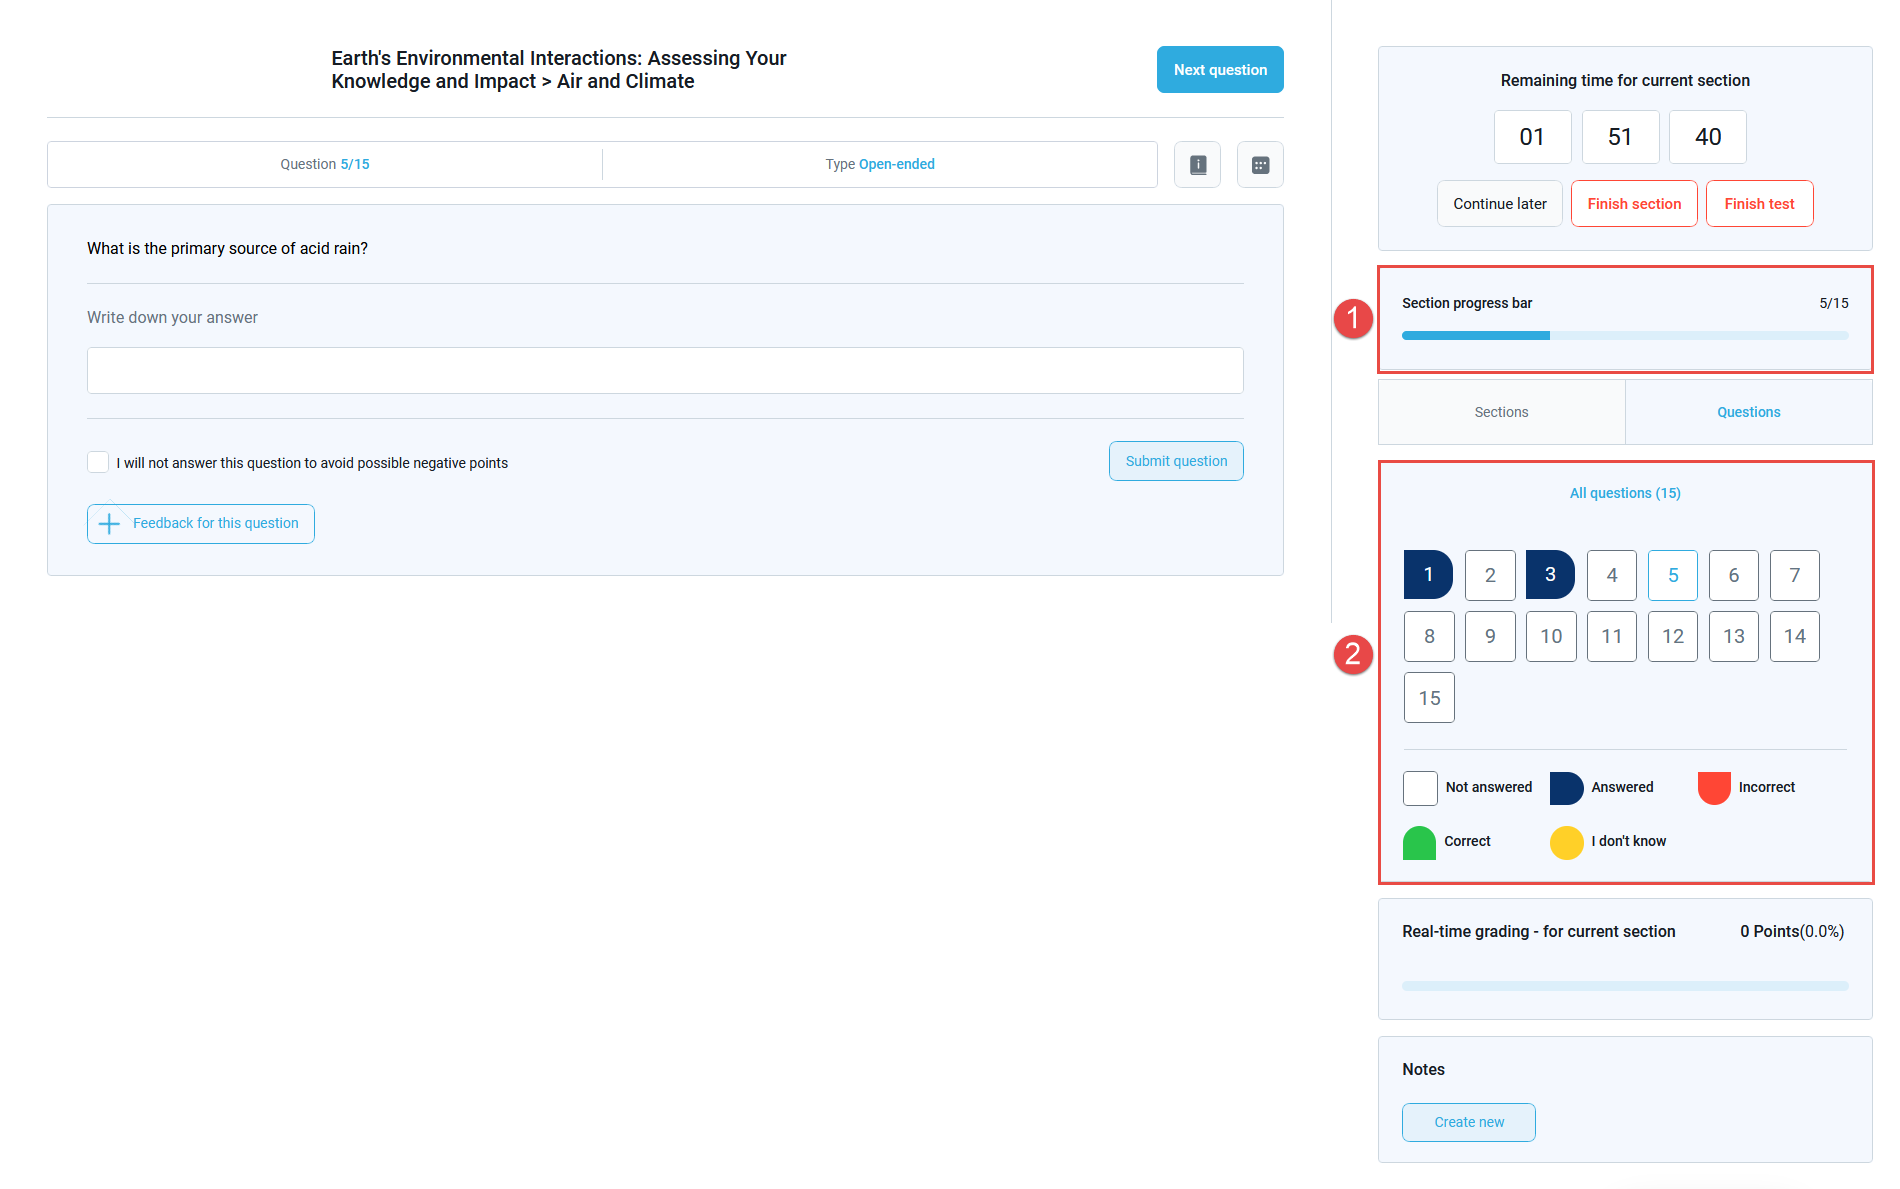
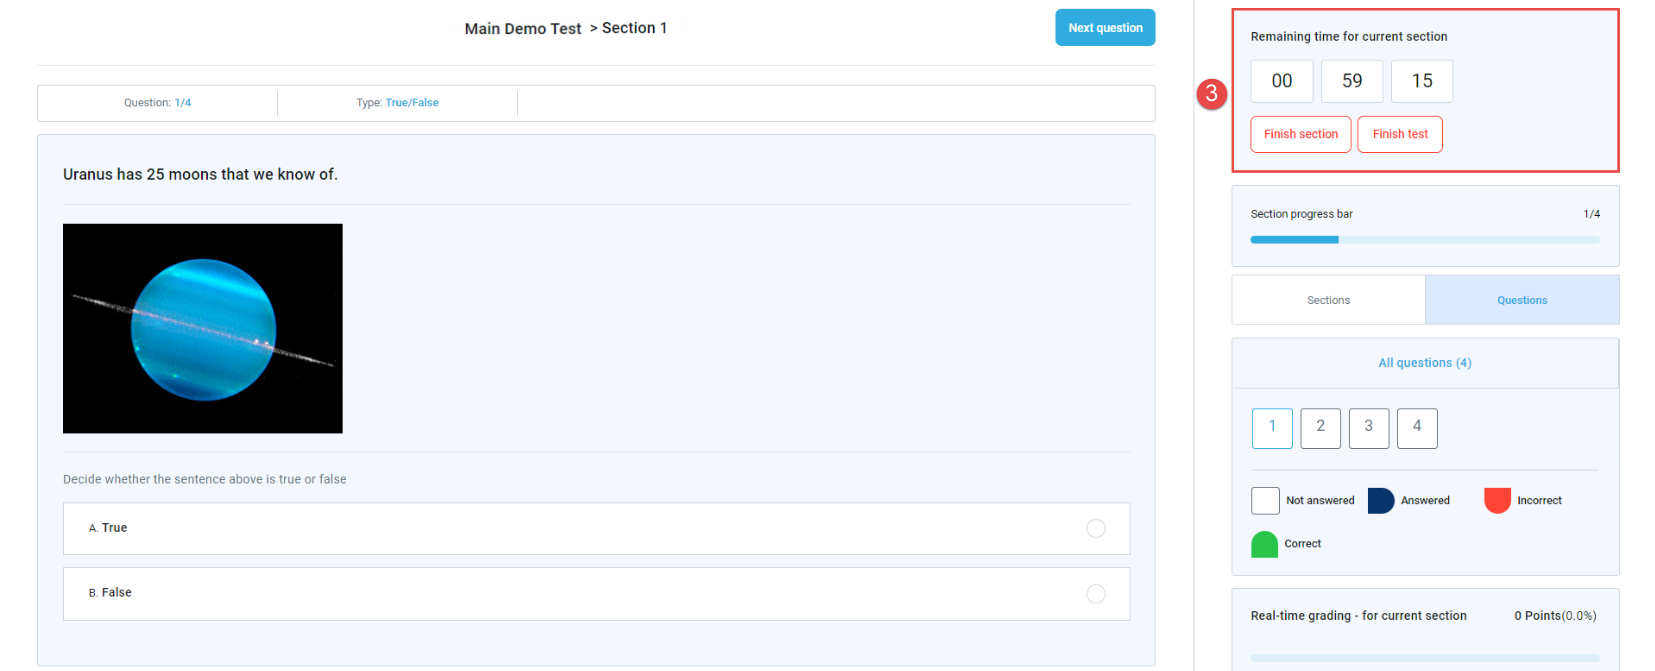
Progress bar
-
The bar visually represents the progress of answering questions out of the total number of questions in a section or the entire test.
-
Symbols and colors indicate the status of each question:
-
White field - Question is unanswered.
-
Yellow field - Question is skipped because the I will not answer this question to avoid possible negative points option was selected.
-
Blue field - Question is answered.
Note: If the test is not graded automatically in real-time, the field will be blue when the question cannot be automatically graded, and the test manager must rate it.
-
Green field - Question is answered correctly. This color is used only when the test is automatically graded in real-time.
-
Red field - Question was answered incorrectly. This color is used only when the test is automatically graded in real-time.
-
-
-
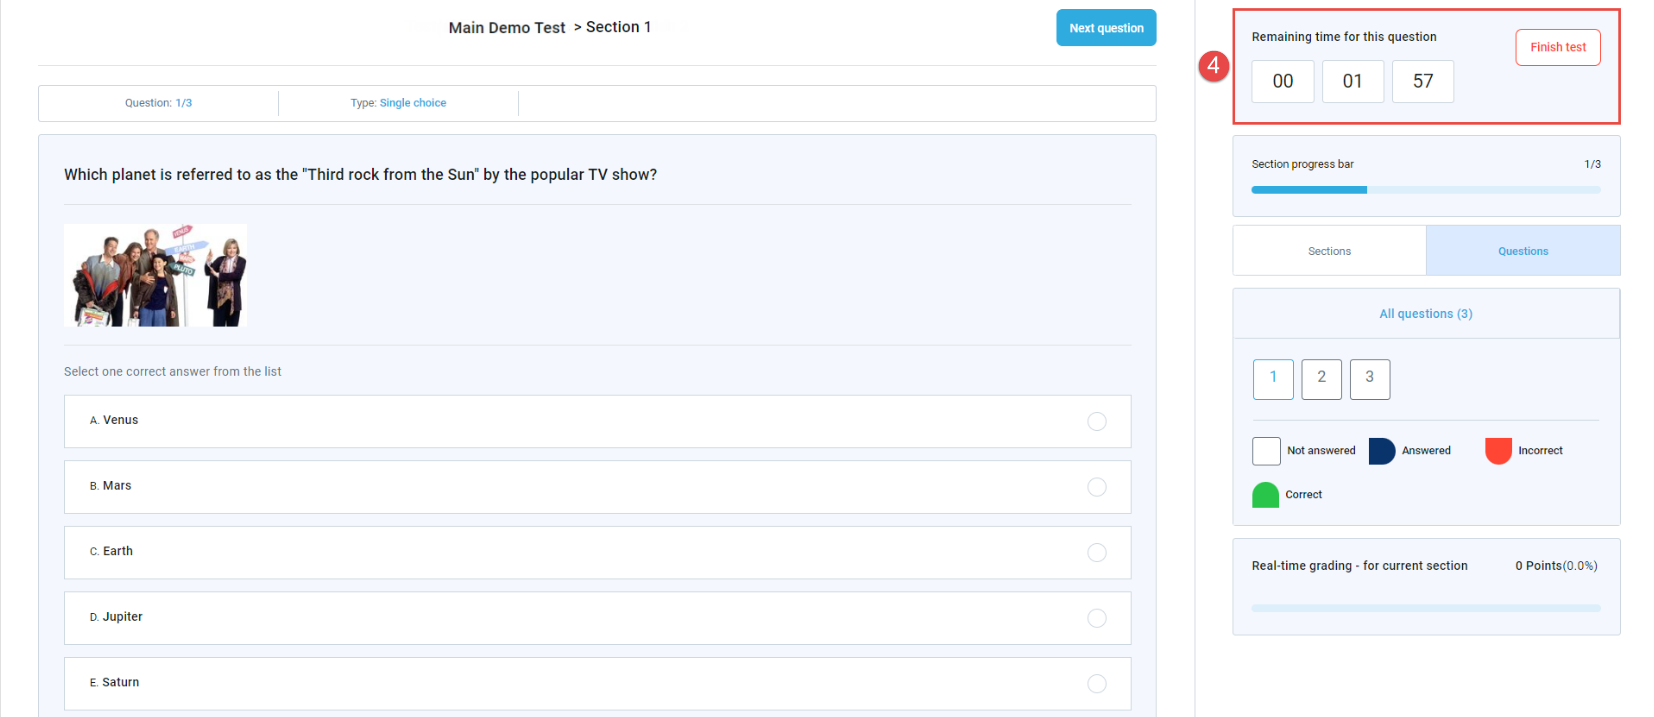
Test timing
Depending on the test settings, you may have:
-
Unlimited time to answer questions. In that case, the test does not contain a timer.
-
Time limit for completing the entire test.
-
Time limit for completing each section.
-
Time limit for answering each question.
-
-
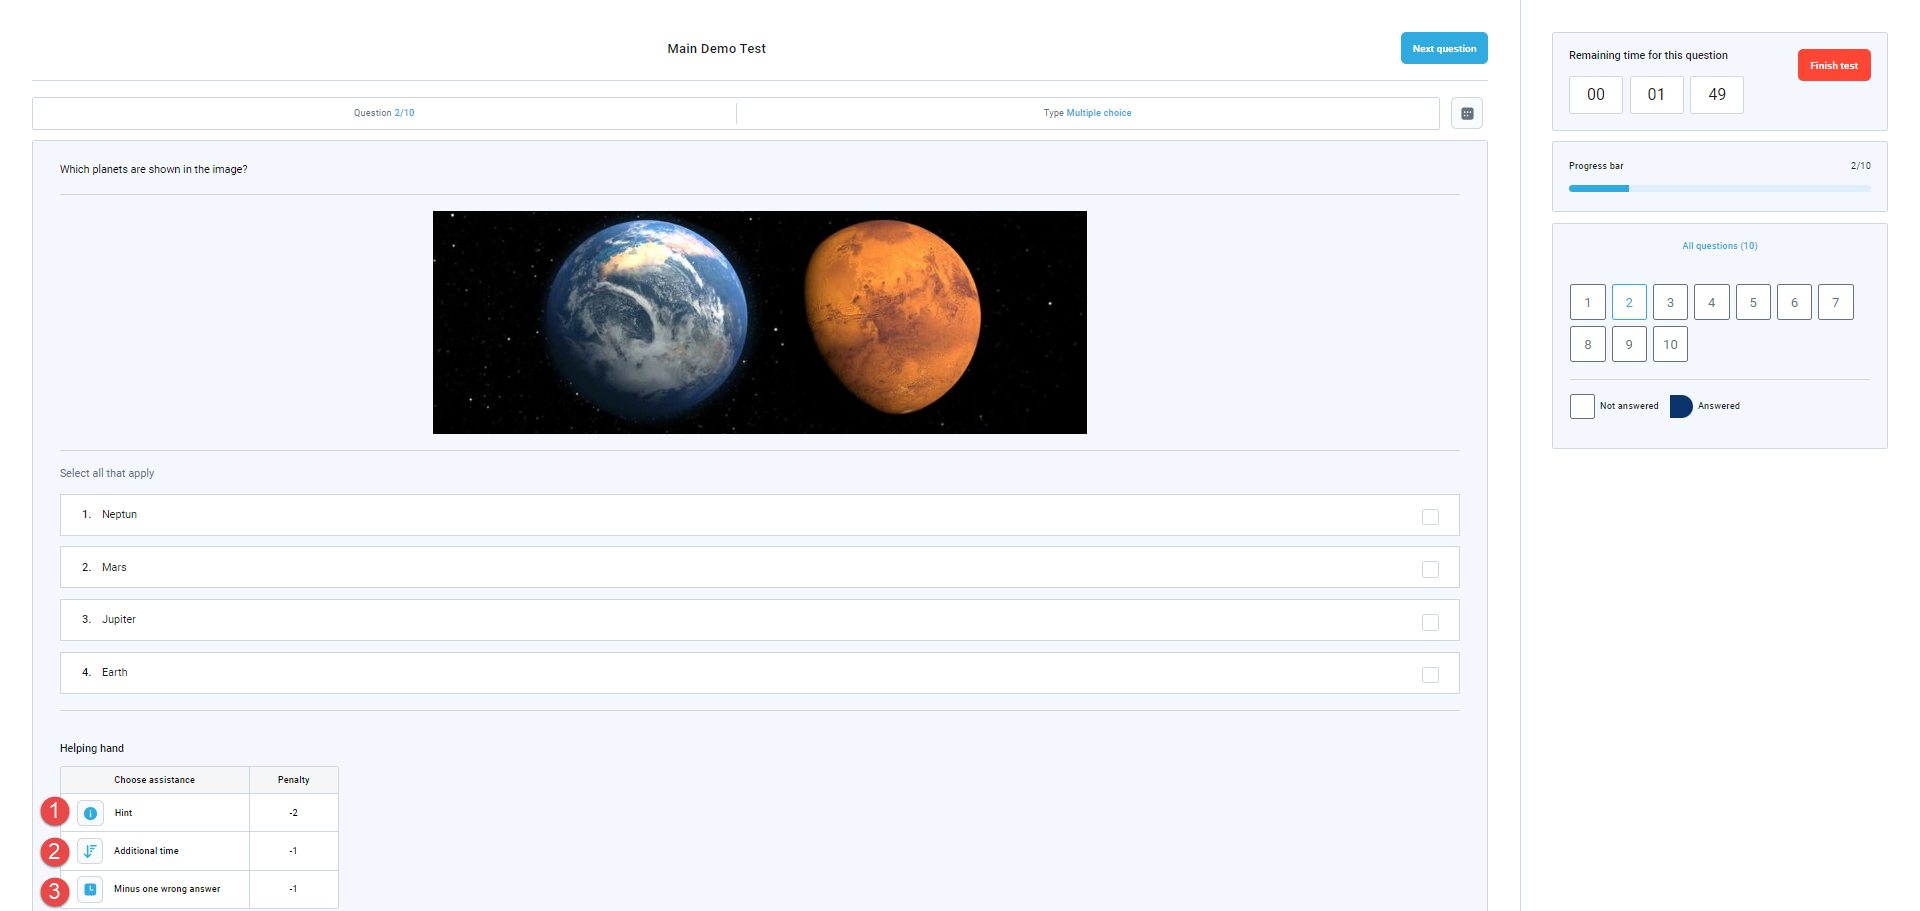
Hints
Depending on the test options and the type of question, you may utilize the following forms of assistance:
-
Hint - Provides additional text to aid in answering the question.
-
Additional time to answer the question.
-
Minus one wrong answer - Removes one incorrect answer.
Note: Using assistance may affect the total number of points earned, especially if they carry penalty points. If you use assistance and answer the question correctly, the total number of points achieved will be reduced by the assistance penalty points.
-
-
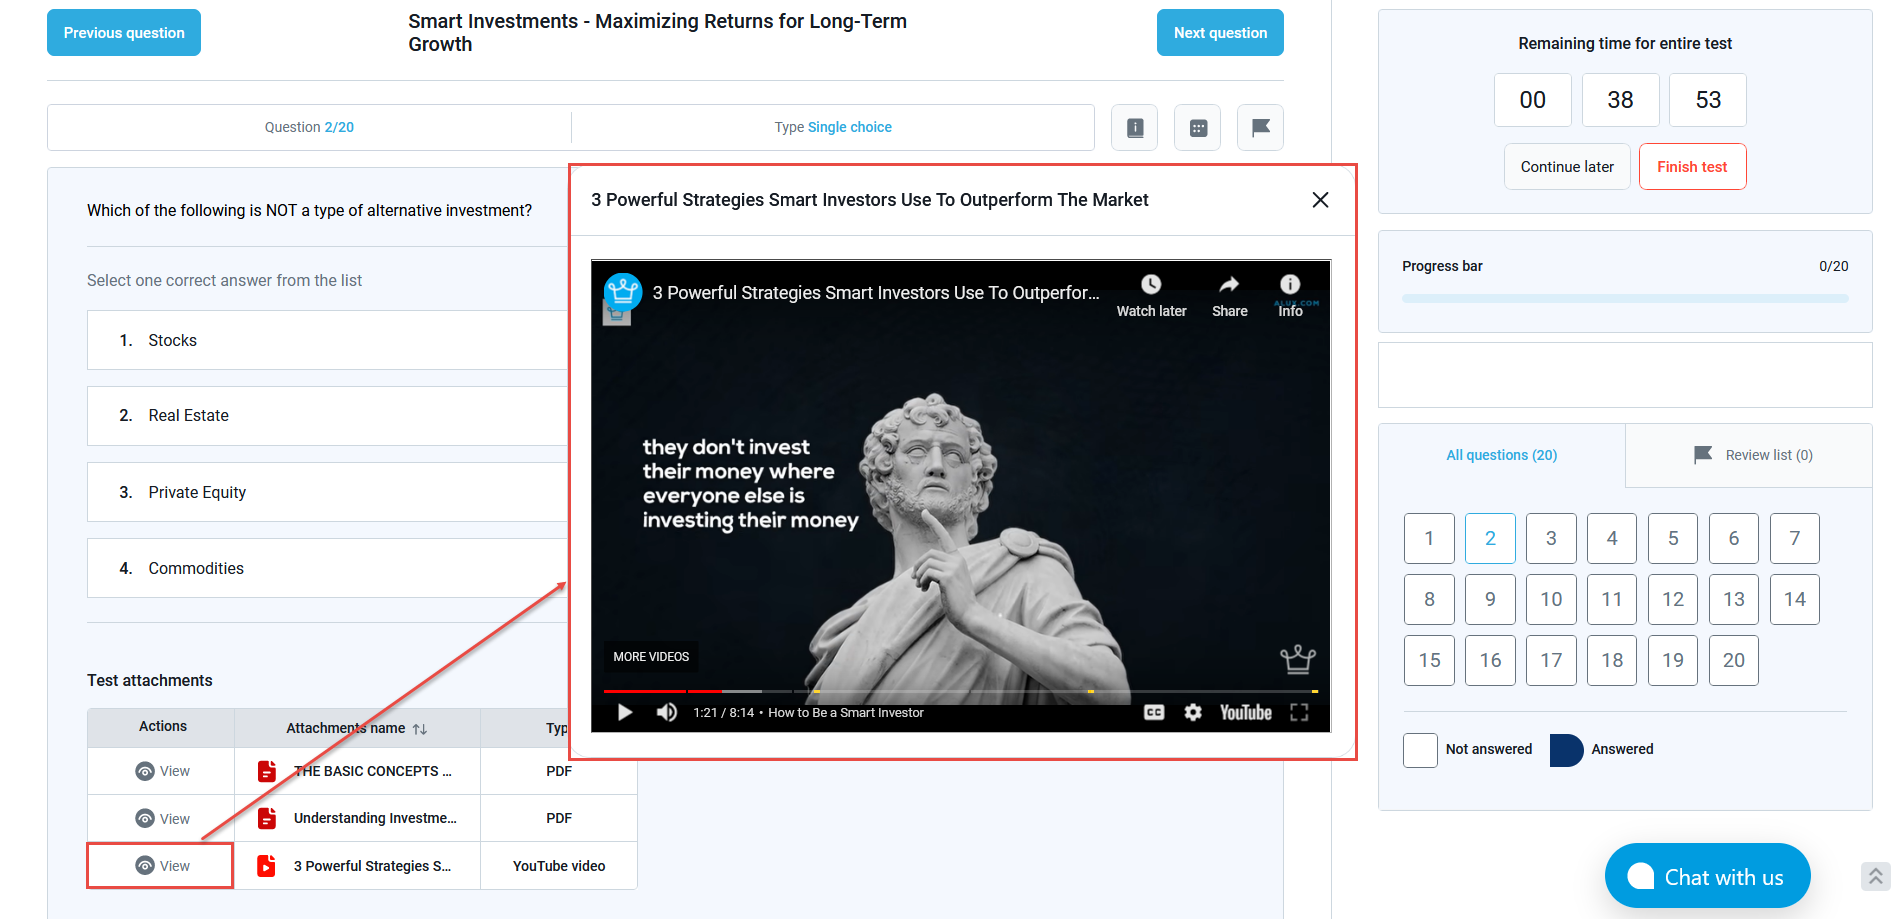
Attachments
Attachments can be added to questions, sections, and/or tests. Next to each attachment, there is an option to view it.
By clicking on the View button, the attachment will open in a pop-up window.
Note: In browser lockdown mode, only picture, text, and video attachments (videos that can be played while test-taking) are supported. Link attachments are disabled.
-
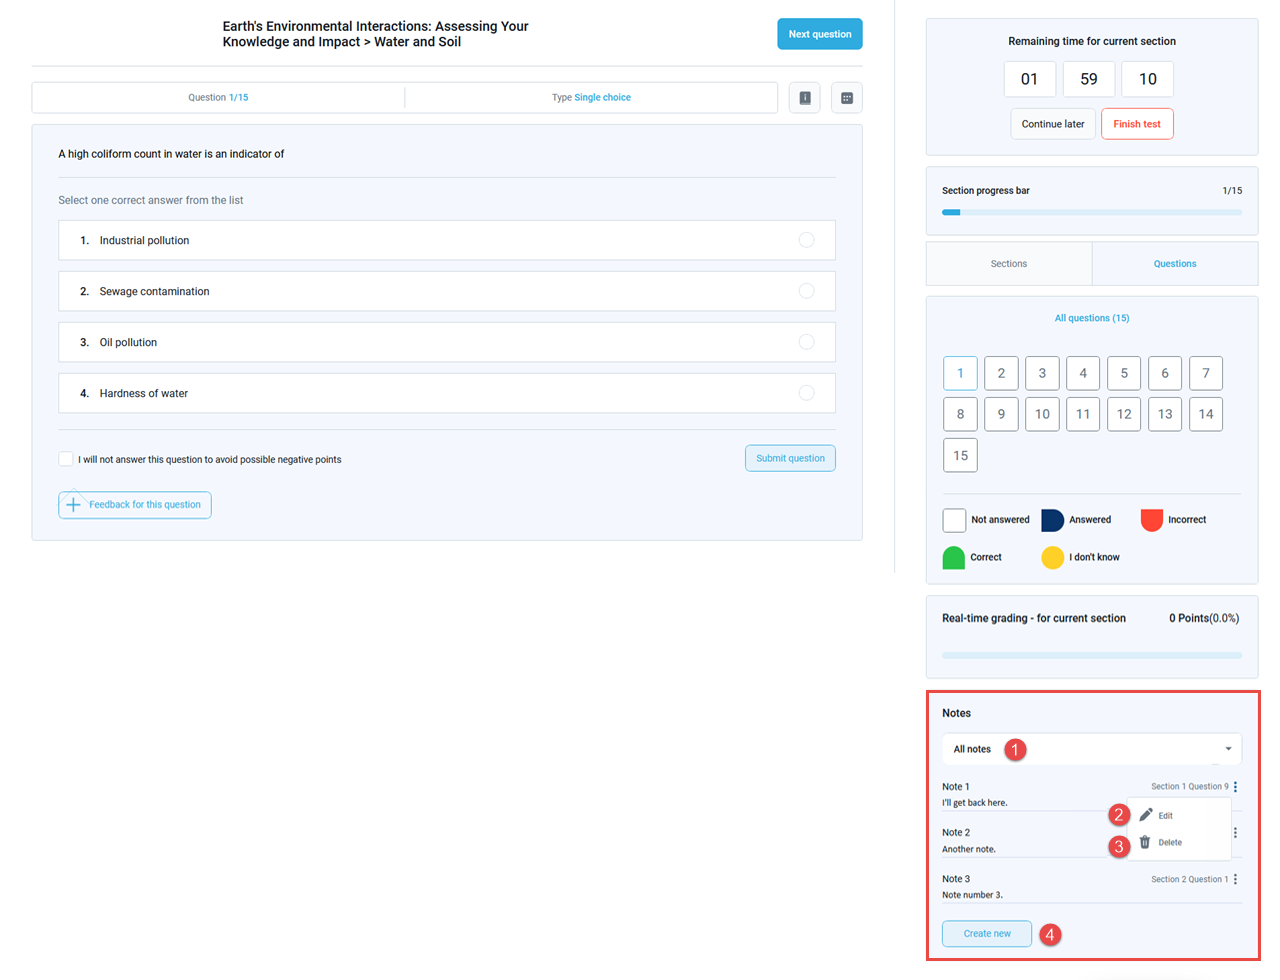
Notes
-
Filter notes by section or question ordinal number.
-
Edit and preview the note in a new dialog.
-
Delete the selected note.
-
Create a new note for a question.
You can take notes during the test-taking process to save your calculations, notes, and thoughts. The Notes section contains a list of all the notes made throughout the test. Depending on the test settings, your notes will be visible only to you or also to the test managers. Available actions related to notes include:
-
-
Finishing the test
After clicking the button to complete the test, a window may appear for the following reasons:
-
To inform you that you have unanswered questions, and questions you have skipped in the section.
Click the Yes button to finish the section regardless of the unanswered questions, or the No button to return to the questions.
-
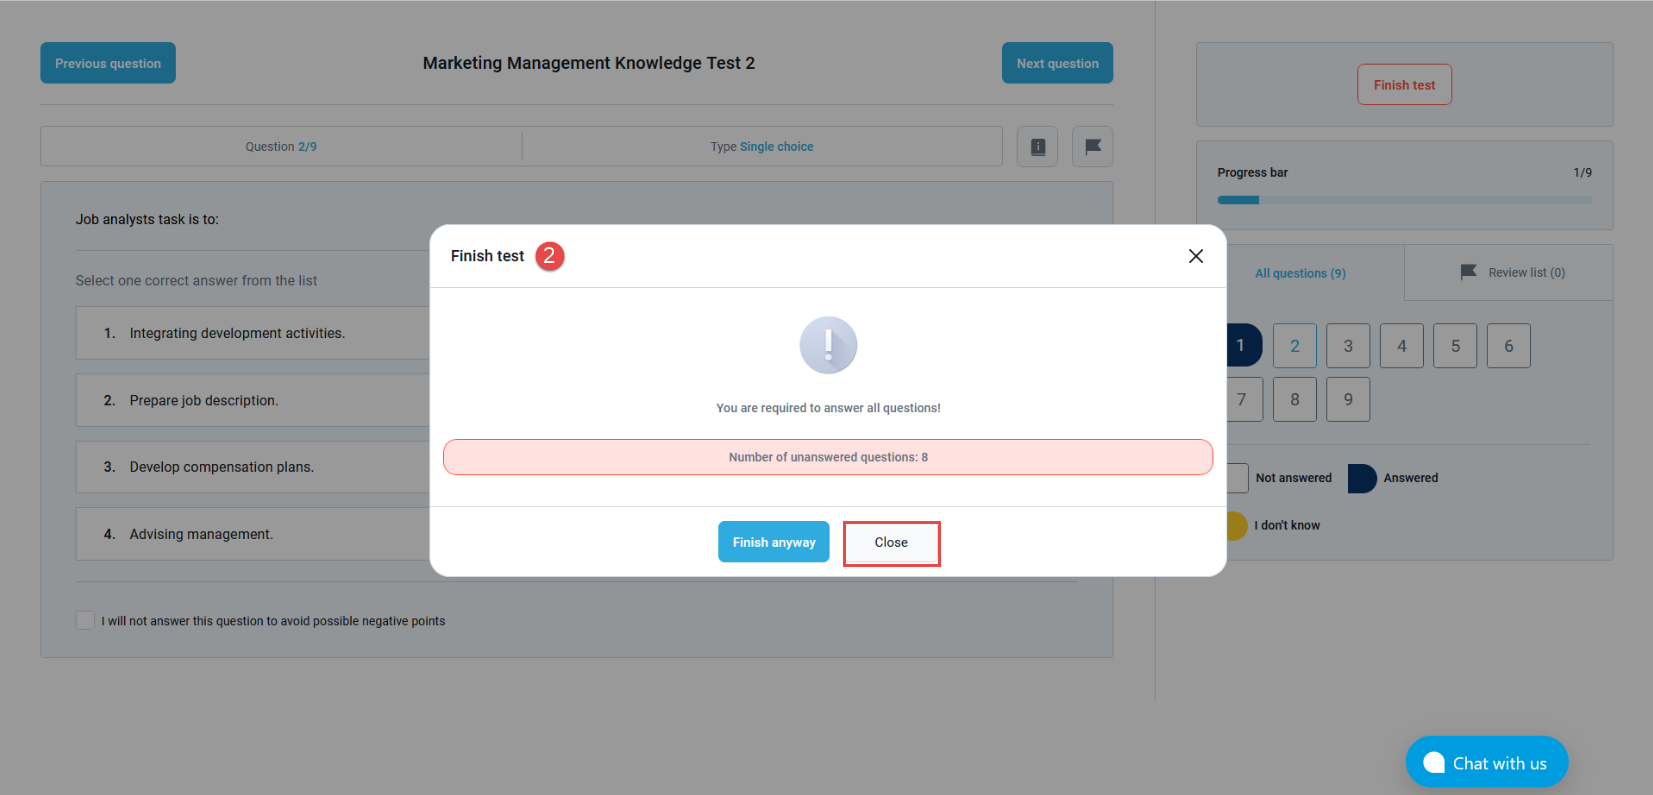
To warn you that you have unanswered questions. Click the Close button to answer the remaining questions.
Note: This will happen if the option that requires answering all questions was enabled during test creation.
-
To ask you if you are sure you want to finish the test. If you are certain, click the Yes button. If you want to check your answers again, click the No button to return to the test.
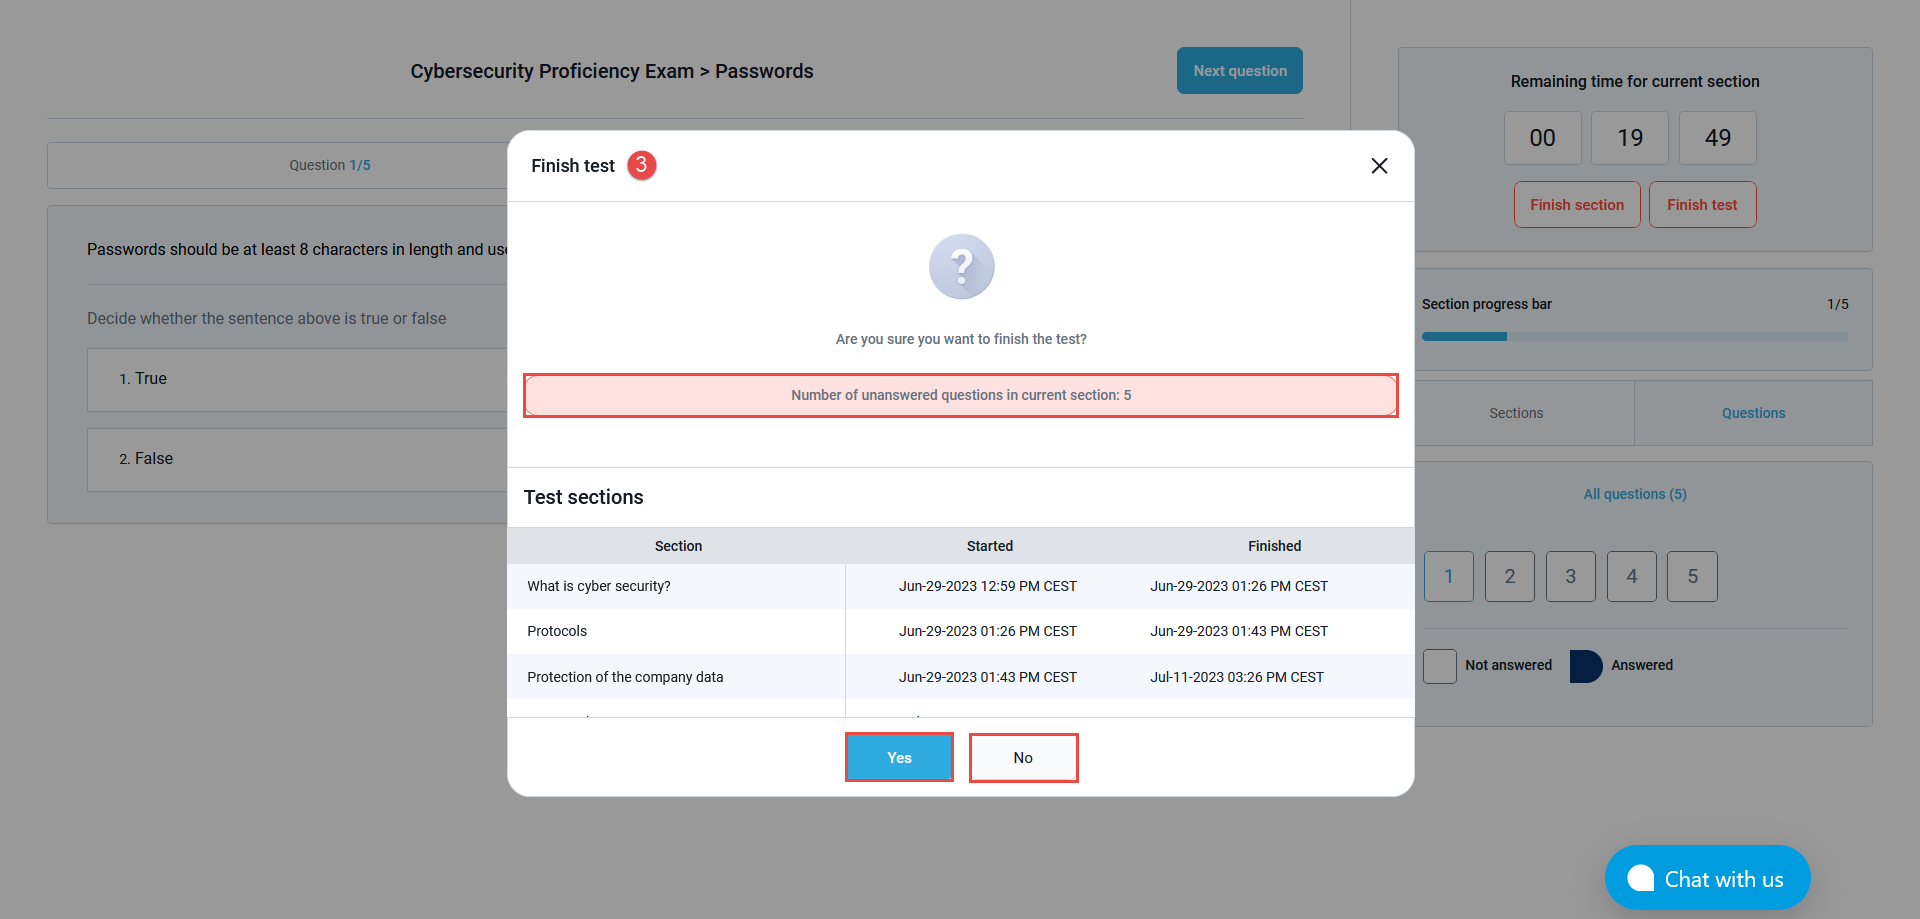
Note: After completing the test, depending on the test configuration, you may be redirected to a report, or you may be required to log out of the application.
-
-
